3D printing has been one of the many burgeoning new technologies to have hit the market in the past couple years, with vast and revolutionary applications. In fact, President Obama even mentioned 3D fabrication in his State of the Union Address. However, it wasn’t until a couple months ago that a special kickstarter released its series of “Printrbots”: (relatively) low cost 3D printers for students and users with a limited budget, opening up the fascinating world of 3D home manufacturing to those like myself.
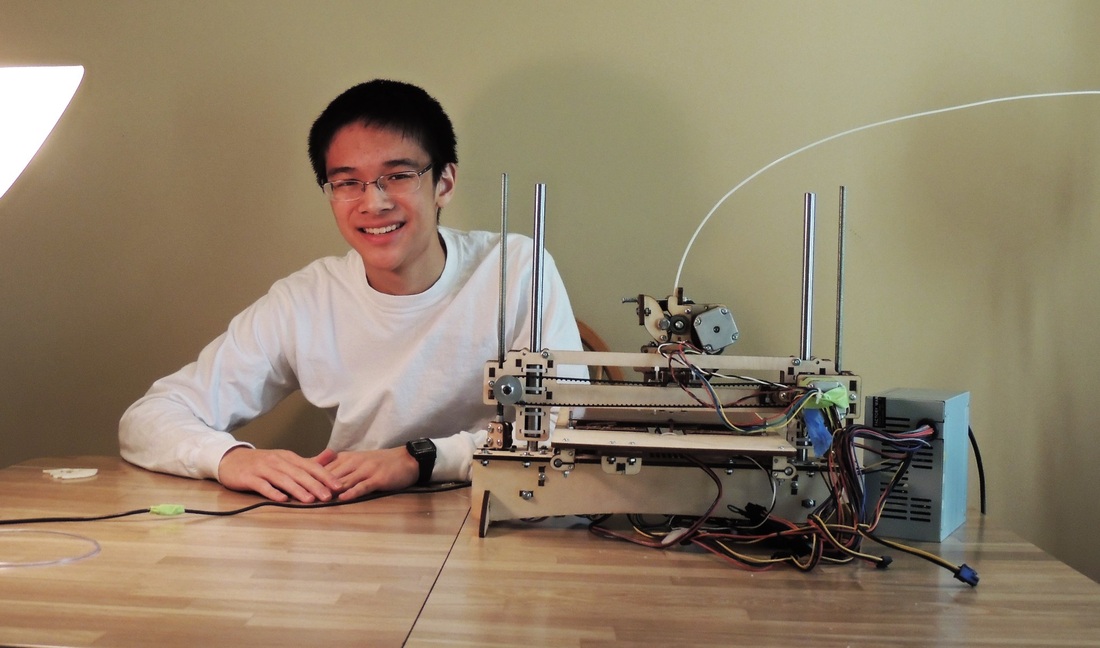
Printrbot LLC has released several models, each with different print bed dimensions, allowing for prints of varying size and volume. The specific model that I own, the Printrbot PLUS, has a print volume of 8” x 8” x 8”: a useful print volume for medium-size applications. My printer extrudes a thin plastic filament, which once deposited, solidifies to form a solid object. It prints in ABS or PLA plastic filament, which will be discussed later.
For reference, the "Pocket" I describe later in this post refers to the ring collecting mechanism that was part of my school's robotics team's robot for the FTC "Ring It Up" challenge in 2012-13.
If you're unfamiliar with FTC, here's their website: http://www.usfirst.org/roboticsprograms/ftc
How 3D Printers Work
There are many approaches to creating 3 dimensional models from a CAD design. Some of the newer approaches, such as Stereolithography, use lasers to solidify controlled amounts of plastic resin slowly, inch by inch, extracting the final product. Such methods can produce staggeringly detailed results, with strength comparable to an injected molded piece. Commercial 3d printers, such as the FORM 1 by Formlabs use this technique.
Another approach to 3D printing involves the use of a heated element, or extruder, to slowly deposit a thin strand of melted plastic less than a millimeter thick. Depositing these strands in an orderly fashion, 3D printers of this type can produce very acceptable prints, although with less resolution than a printer like the FORM 1.
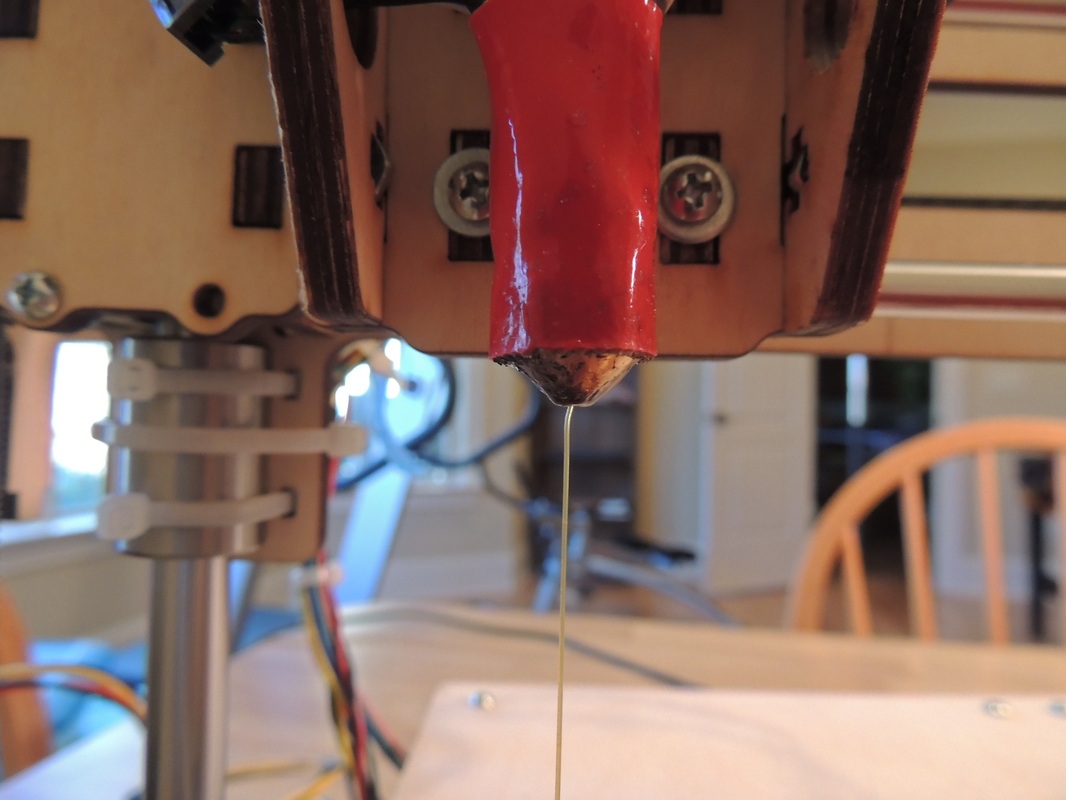
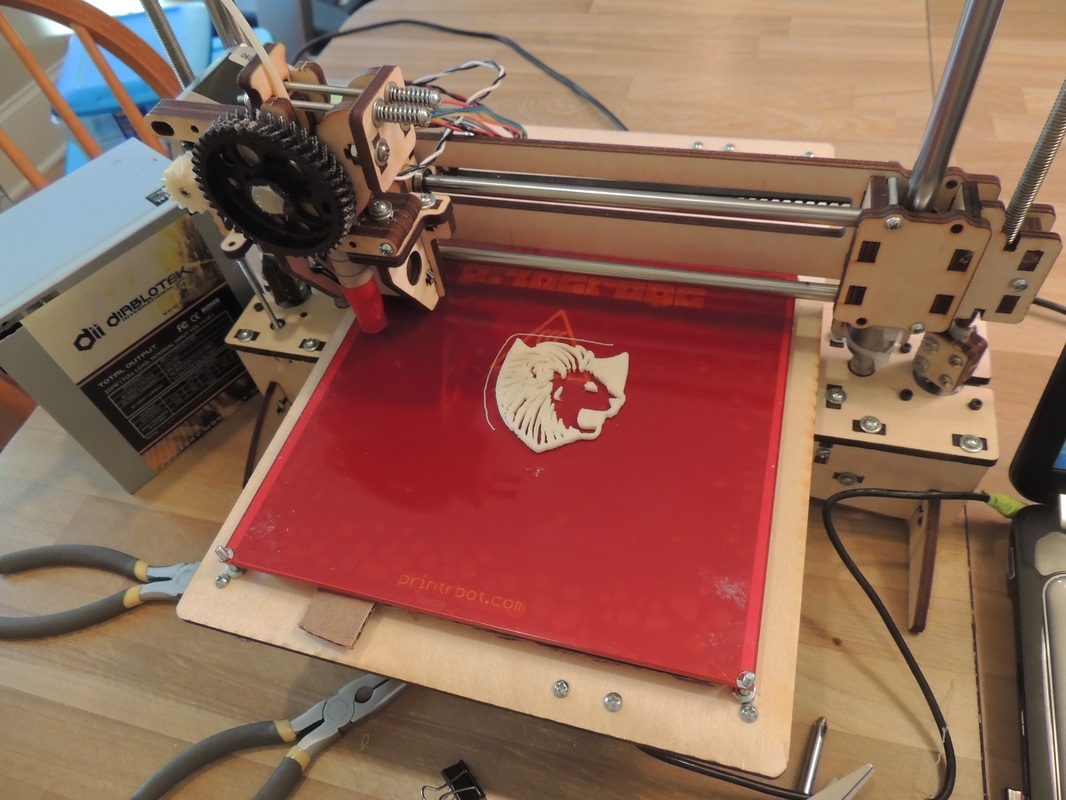
In the picture below, notice the thin strand of extruded plastic being ejected from the Extruder (the Red component).
Printrbot LLC has released several models, each with different print bed dimensions, allowing for prints of varying size and volume. The specific model that I own, the Printrbot PLUS, has a print volume of 8” x 8” x 8”: a useful print volume for medium-size applications. My printer extrudes a thin plastic filament, which once deposited, solidifies to form a solid object. It prints in ABS or PLA plastic filament, which will be discussed later.
For reference, the "Pocket" I describe later in this post refers to the ring collecting mechanism that was part of my school's robotics team's robot for the FTC "Ring It Up" challenge in 2012-13.
If you're unfamiliar with FTC, here's their website: http://www.usfirst.org/roboticsprograms/ftc
How 3D Printers Work
There are many approaches to creating 3 dimensional models from a CAD design. Some of the newer approaches, such as Stereolithography, use lasers to solidify controlled amounts of plastic resin slowly, inch by inch, extracting the final product. Such methods can produce staggeringly detailed results, with strength comparable to an injected molded piece. Commercial 3d printers, such as the FORM 1 by Formlabs use this technique.
Another approach to 3D printing involves the use of a heated element, or extruder, to slowly deposit a thin strand of melted plastic less than a millimeter thick. Depositing these strands in an orderly fashion, 3D printers of this type can produce very acceptable prints, although with less resolution than a printer like the FORM 1.
In the picture below, notice the thin strand of extruded plastic being ejected from the Extruder (the Red component).
Printing: from Start to Finish
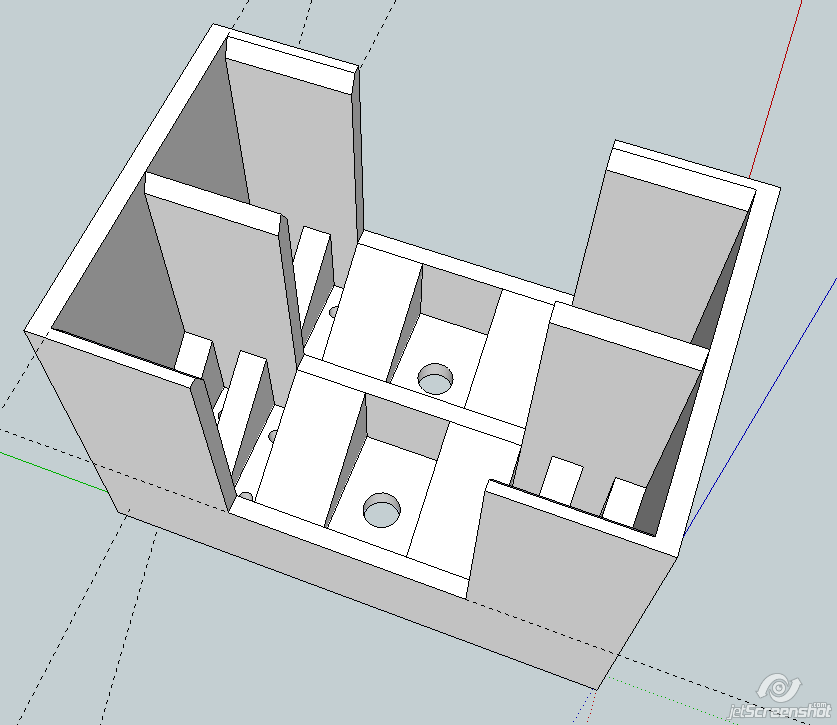
1. Design a model to scale in a 3D CAD software, such as Blender, Solidworks, or Sketchup (to name a few programs). I used Sketchup, as it provided the simplest method of designing a Pocket (no arches, rounded surfaces, etc).
1. Design a model to scale in a 3D CAD software, such as Blender, Solidworks, or Sketchup (to name a few programs). I used Sketchup, as it provided the simplest method of designing a Pocket (no arches, rounded surfaces, etc).
2. “Pronterface,” the program used to interface with the printer, only accepts .STL files, and Sketchup only saves in SKP files. In order to solve this problem, I downloaded and installed a plugin for Sketchup, which allowed me to export my model as a .STL. Uploading the file to Pronterface, the program interpreted the file, and exported “Gcode" for the printer to read.
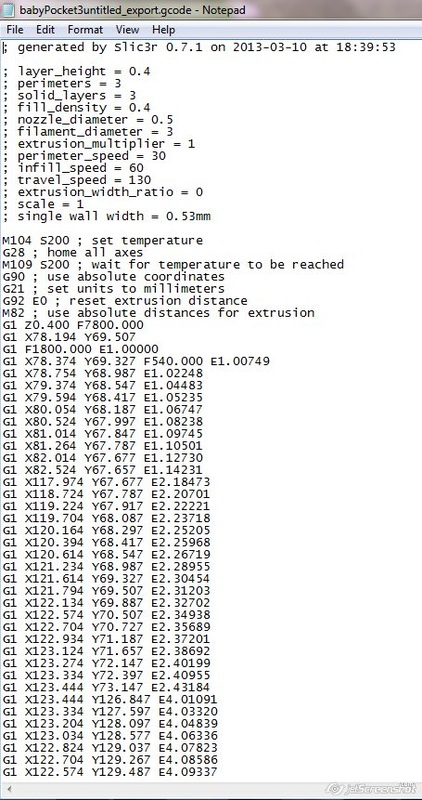
3. Gcode is the special, low-level code by which the printer receives its instructions. As you can see, Gcode is essentially a long list of coordinates the printer positions the plastic extruder over, in order to print an object, as well as some parameters and settings for the printer to recognize.
3. Gcode is the special, low-level code by which the printer receives its instructions. As you can see, Gcode is essentially a long list of coordinates the printer positions the plastic extruder over, in order to print an object, as well as some parameters and settings for the printer to recognize.
4. One major challenge that I encountered was getting the printing bed to heat up to a high enough temperature for the melted plastic to adhere to. If the bed isn’t the right temperature, instead of a nice, original 3D object, the product will be more like this:

Bad!! A blob of plastic spaghetti isn’t what we need to pick up rings!
In order to solve this problem, I had to do quite extensive experimentation to find the best heat insulator for the heat bed (red in picture above). The problem was that with its small thickness and wide surface area, the heat bed couldn’t reach the needed 80 degrees celsius because it was cooling faster than it could heat. After testing lining the bottom of the bed with tissue paper, glass, wood, among other things, I discovered that cardboard was in fact the best insulator. Corrugated cardboard is a surprisingly effective insulator, for the simple fact that its low density allows for lots of contained pockets of air to exist within it.
In order to solve this problem, I had to do quite extensive experimentation to find the best heat insulator for the heat bed (red in picture above). The problem was that with its small thickness and wide surface area, the heat bed couldn’t reach the needed 80 degrees celsius because it was cooling faster than it could heat. After testing lining the bottom of the bed with tissue paper, glass, wood, among other things, I discovered that cardboard was in fact the best insulator. Corrugated cardboard is a surprisingly effective insulator, for the simple fact that its low density allows for lots of contained pockets of air to exist within it.
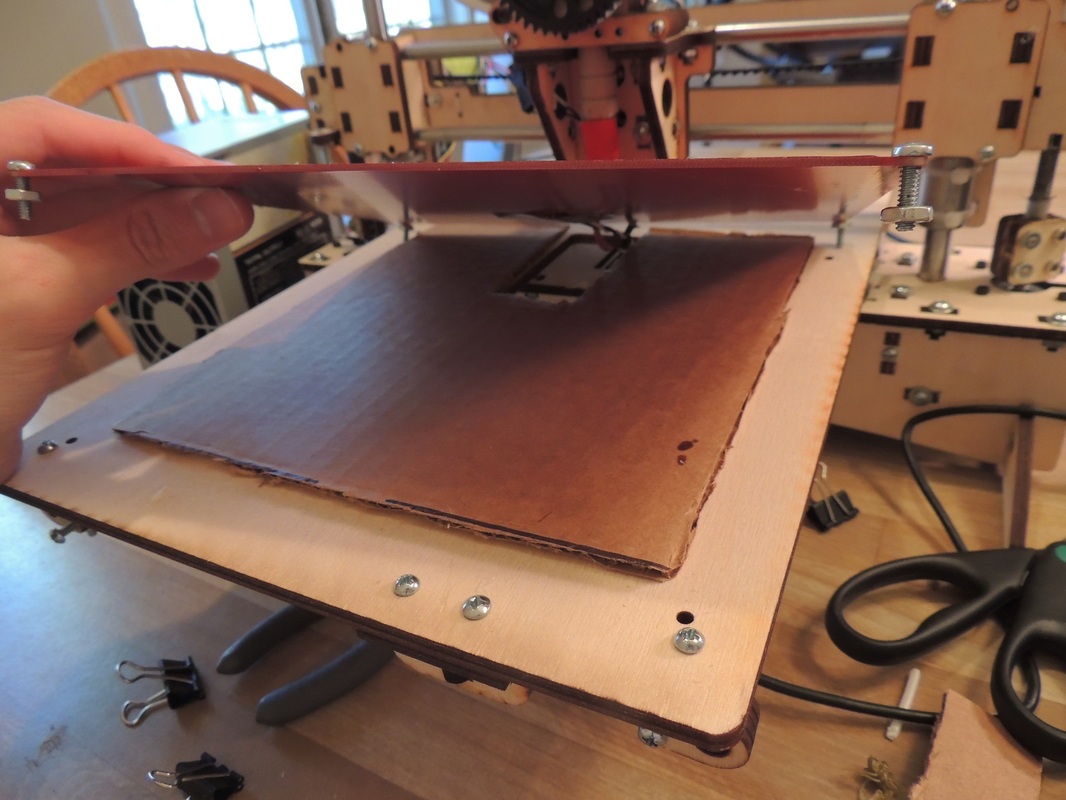
Above: A sheet of cardboard from a packing box was placed underneath the red heat bed, which was bolted down and secured for printing.
5. Once all the calibration has been completed, including making sure the printing surface is level, and the X, Y, and Z carriage is lubricated and centered, the printing process can begin!
5. Once all the calibration has been completed, including making sure the printing surface is level, and the X, Y, and Z carriage is lubricated and centered, the printing process can begin!
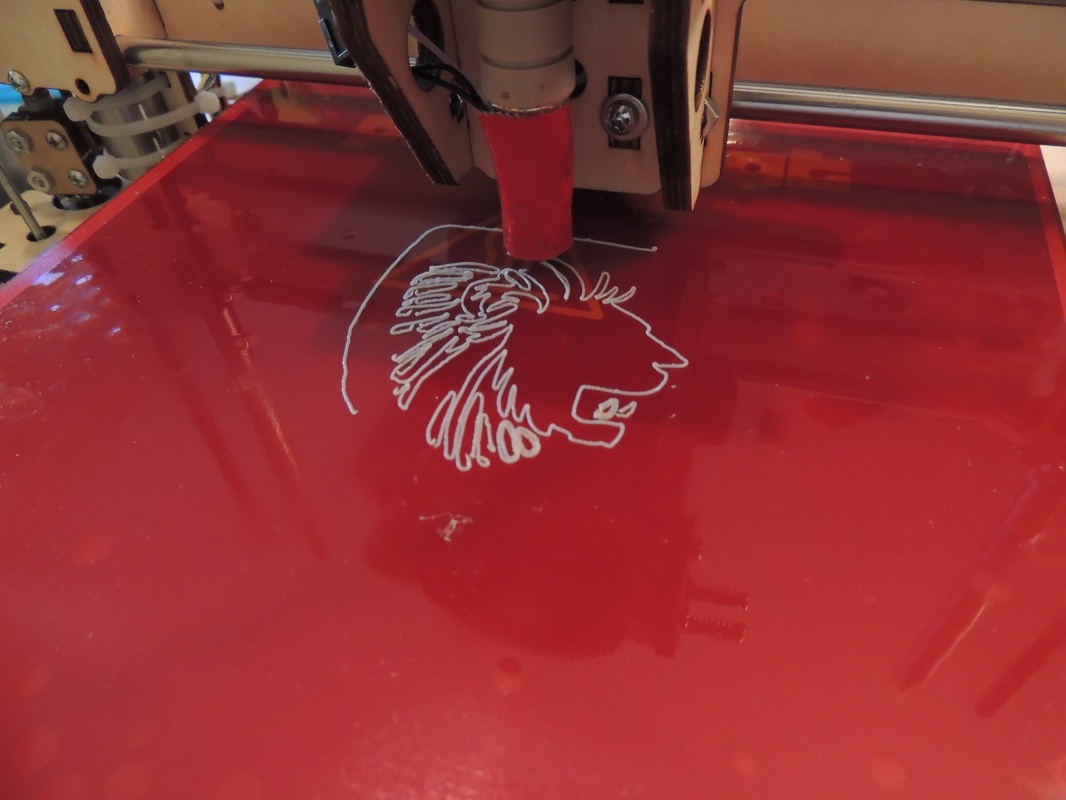
Notice the long, separate line of plastic around the perimeter of the print subject. This is called a “skirt,” and is printed as a way to “prime,” the extruder, making sure there’s no extra plastic sitting in the extruder when printing the actual object. Without skirting, the print may be full of mishap blobs, disrupting up the precision of the print.
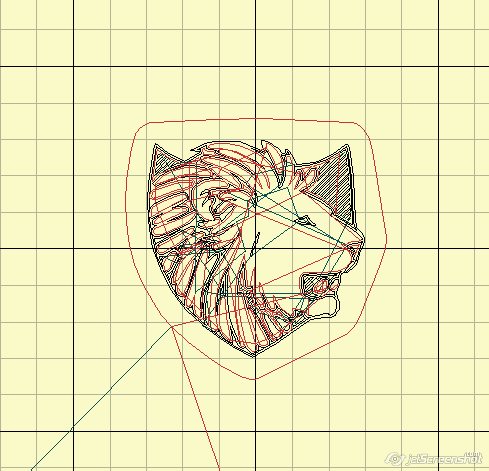
6. After printing for anywhere from 10 minutes to 10+ hours depending the object to be printed, the print (assuming enough plastic) should be complete! During the printing process, Pronterface has a schematic of the layers that the printer is processing. As the print progresses, the areas that have been printed are shown in red, and the black areas are where the printer still needs to fill.
6. After printing for anywhere from 10 minutes to 10+ hours depending the object to be printed, the print (assuming enough plastic) should be complete! During the printing process, Pronterface has a schematic of the layers that the printer is processing. As the print progresses, the areas that have been printed are shown in red, and the black areas are where the printer still needs to fill.
All finished!
Reflection
3D printing is an amazing new technology, but still in its early stages of development. Achieving the results that I did took incredible patience, and countless hours testing, tweaking, “accidentally destroying,” and building. It was a great learning experience to build my own 3D printer, and certainly expanded my abilities as an engineer and problem solver. For instance, some of the laser cut birch components that came in the kit were mislabeled, defective, or missing. While this was clearly on the fault of the supplier, I was able to find my way around these obstacles, and further engineer the printer design with my own modifications. Some of these modifications include print bed leveling, Z-axis endstop switch contacts, print bed glass cover, extruder gear assembly, and Z-axis threaded rod fine-tuning. In addition to the hardware changes, I also changed some of the Gcode in order to enable manual settings of the temperature for the heating element in the extruder and print bed. The default settings of the printing temperature set the heating elements to 200 degrees celsius, a good general-purpose temperature, but after some research, I discovered that for printing with PLA plastic, a hot end temp. of 180 C is optimal, and for ABS, 230 C.
In total, the printer took around 20-25 hours to build (including several hardware store runs), and around 10 hours to properly configure and start printing regularly. The printer still has room for improvement, however, and in the next few weeks I’ll be figuring out how to upgrade its power supply, allowing it to have quicker print speeds, and more consistent heating rates for its extruder and print bed. In summary, 3D printing is a fascinating new technology, and I’m proud to be among the early waves of pioneering hobbyists and students to discover it.
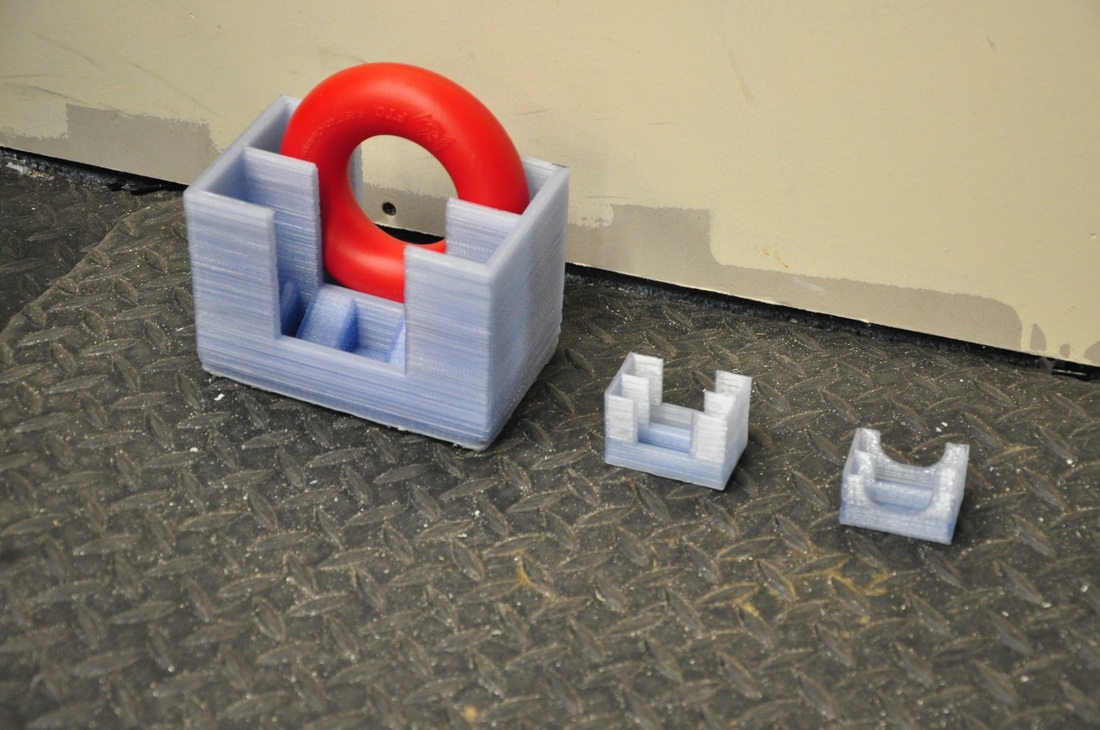
The “Pocket” used in our robot (left) took 10 hours and 43 minutes to print, using up about half a kilogram of plastic. Before printing the final product, several editions of the pocket were test printed at about one fourth the scale of the final product. These “Baby Pockets” allowed me to optimize the design options, as well as practice printing relatively quickly.
~ Ctrl
~ Ctrl

 RSS Feed
